

Hyperdimension Neptunia Rebirth 3 V Generation Review
Hyperdimension Neptunia Rebirth 3 V Generation (HNR3) is a Japanese style turn based Role Playing Game in which you take control of Neptune, a CPU that is one of the main superpowers in the world. From her home base of Planeptune you must take on quests and missions as you level yourself up and become once again the guardian that you were destined to be.

Hyperdimension Neptunia Rebirth 3 V Generation (HNR3) is a Japanese style turn based Role Playing Game in which you take control of Neptune, a CPU that is one of the main superpowers in the world. From her home base of Planeptune you must take on quests and missions as you level yourself up and become once again the guardian that you were destined to be.
The story is simple enough to get involved in even if, like me, you haven’t played any of the previous titles. There is plenty of information available to provide you with enough backstory for you to push forward and enjoy the game. I found the dialogue in the game trying in many places and found myself having to fight the urge to skip quickly. It was acted out well, but the writing was poor and I felt it didn’t flow and was quite forced in places. Overall, it was easy to engage in, though and was actually pretty funny at certain points.

The battle mechanics at first are a little strange and can be off-putting, however after not very long, you get used to them and begin to sweep away enemies with ease. Whilst in a battle you can freely move your character around a pre highlighted area. You want to try and position yourself so none of the enemies will hit you from behind whilst still trying to do damage to your opponents. The styles of attacks are simple enough, in essence you have a SP Skill which is your special attack, only useable when you charge up a bar below your health bar. You also have normal attacks which you can combo together to maximise damage. The three types of attack you should use, combo attacks, power attacks and defence breaking attacks, depend on your situation so you have to think tactically what is best for your current situation. The choice in attacks, even with your different styles of basic attacks allows for some combat and tactical decision making which I thoroughly enjoyed.

The character design of the main protagonists are what you would expect from a Japanese style RPG. The bulk of the females have a cute feminine charm however the fact that nearly all of them are top heavy quickly becomes annoying. I felt as though the art designers could have showed a little more creativity than just throwing big breasts into the equation. The armour and enemy design though is the complete opposite, each of which held their own appeal and I enjoyed seeing what wacky creatures I would come across next.
The control system was quite a handful on the PC version which I reviewed and felt quite clunky. I was forced regularly to check the button configuration to find out what button I needed to use to accomplish what I wanted to do. For me, this was the biggest obstacle to try and overcome as I couldn’t ever really relax into the game and just play it. I do feel that it would be much more natural on a controller and the button symbols that are in game suggest the developer feels that way also.

The music in the game is very good, providing the right mood and ambience when necessary. It’s never too strong that it overpowers what is happening in game however it has enough of an effect that it helps set the setting nicely.
Overall, I enjoyed the game with the combat system being the real game selling aspect for me. The dialogue was unfortunately a big turn off and even after a lot of gameplay I still struggled a little with the controls but even this wasn't enough to make me stop playing. I would certainly recommend taking a look at this game but I personally will opt for the console version in the future.
3/5
Thank you to Idea Factory for providing us with a copy of this game to review.
Loot Crate Unboxing :- March 2015
Want to know what's in this months Loot Crate? Then check out The Digital Gamers unboxing video of March's Covert themed Loot Crate!

Hi guys, today I received my Covert themed Loot Crate through the mail and decided to make an unboxing video for you all so you can see what goodies are hiding inside! I hope you all enjoy the video.
The Digital Gamer
Payday 2 Shadowraid Heist Crowbar Locations Guide
I have been searching the net recently for a decent guide on where to find the Crowbars on the Shadowraid Heist on Payday 2 but unfortunately there are a lot of unclear and unhelpful posts. I have created this guide to be as specific and clear about the locations that the Crowbars can spawn on the Shadowraid Heist so other gamers, like myself, won't have to jump through hoops for clear instructions on their locations.
I have been searching the net recently for a decent guide on where to find the Crowbars on the Shadowraid Heist on Payday 2 but unfortunately there are a lot of unclear and unhelpful posts. I have created this guide to be as specific and clear about the locations that the Crowbars can spawn on the Shadowraid Heist so other gamers, like myself, won't have to jump through hoops for clear instructions on their locations. Please note that the Crowbars don't always spawn in every available position every time you play the Heist and may require you to search several spots before finding one.
Crowbar Location #1
The first Crowbar location is the easiest to come across as it tends to be down the route that the majority of players attempting this mission tend to take. Firstly you need to enter the sewers from the manhole located to the left of the main gate near where you spawn. You then need to work your way through the barriers using the thermal paste at your disposal until you arrive at the base of the ladder that leads to the main building.
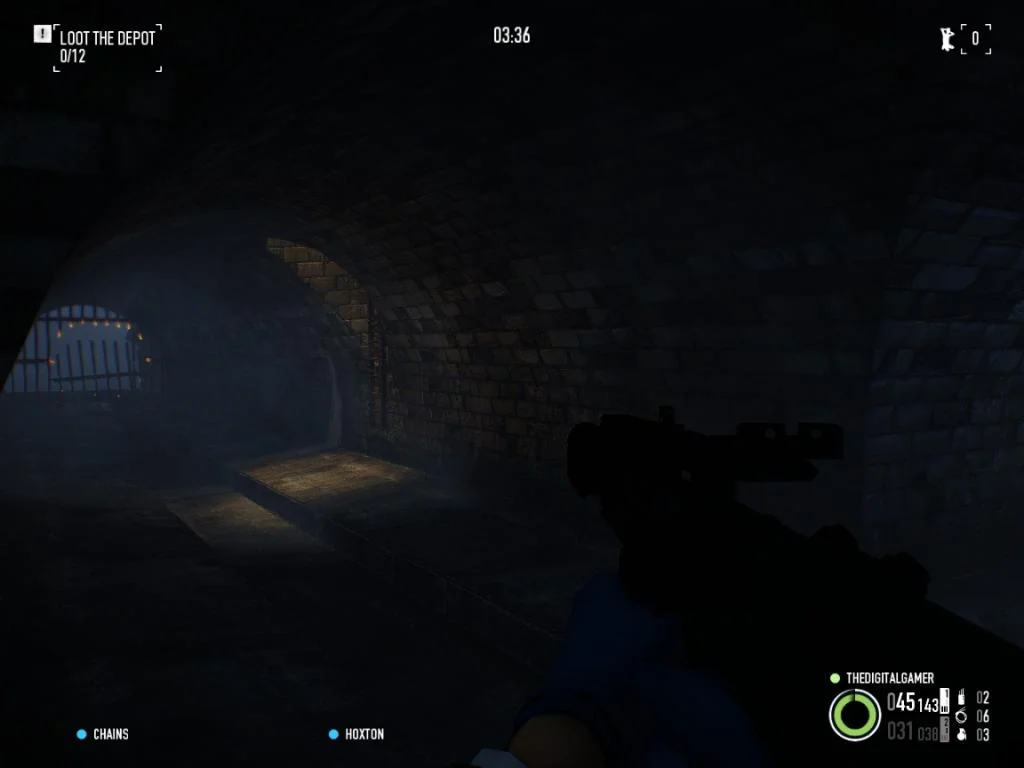
Once you can see the ladder (see picture above for reference) then all you need to do is turn to the right and you will see the Crowbar resting on the ground with a ray of light shining down on it.
Crowbar Location #2
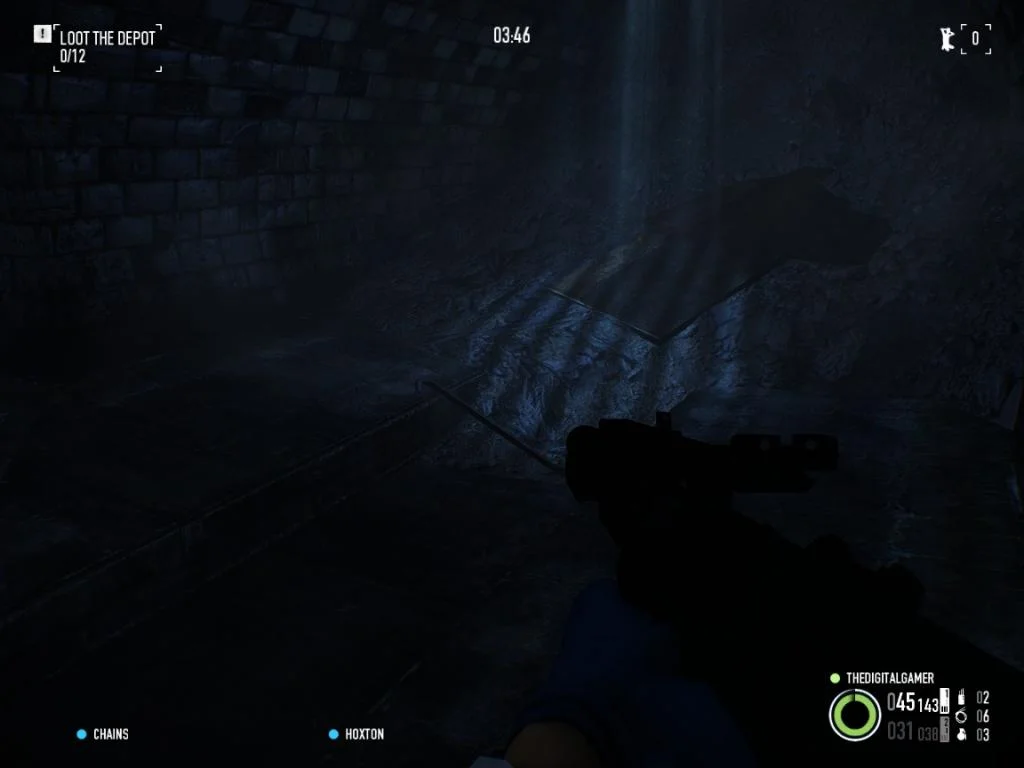
Next up is another easily accessible Crowbar located down the far left hand side of the complex. As before, from the spawn head towards the sewers, however as you reach the manhole walk straight past and then down the side of the complex. Be careful down this side of the building as you can get guards and cameras depending on the difficulty that you are playing. Go down the stairs on your left and then through the fence. You should now be standing with water on your left hand side and the complex on your right.
Keep walking forward until you see the frame that is pictured above, you shouldn't miss it as long as you keep the water on your left. Once you see this structure, continue to hug the building on your right and as you turn towards the skip you will see the crowbar resting against the wall. This can be difficult to spot due to the bush but as you get closer it shouldn't be too hard to see.

Crowbar Location #3
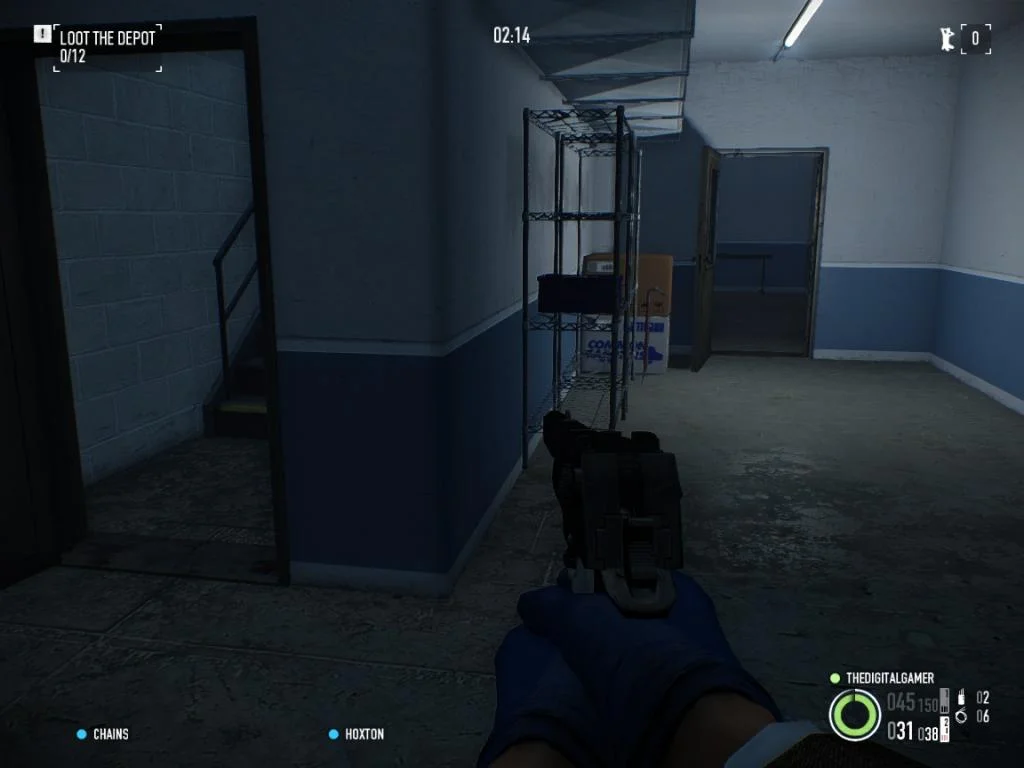
For the next Crowbar you must head up the ladder from the sewers into the main building. This is a common entry point for this mission as its easy to gather bags and throw them down the manhole for easy transportation back to the van. Once in this room you need to head to the room that is directly behind the locker room. To get here, walk towards the yellow caged area and when you see the drinks machine the door you need is directly after there.
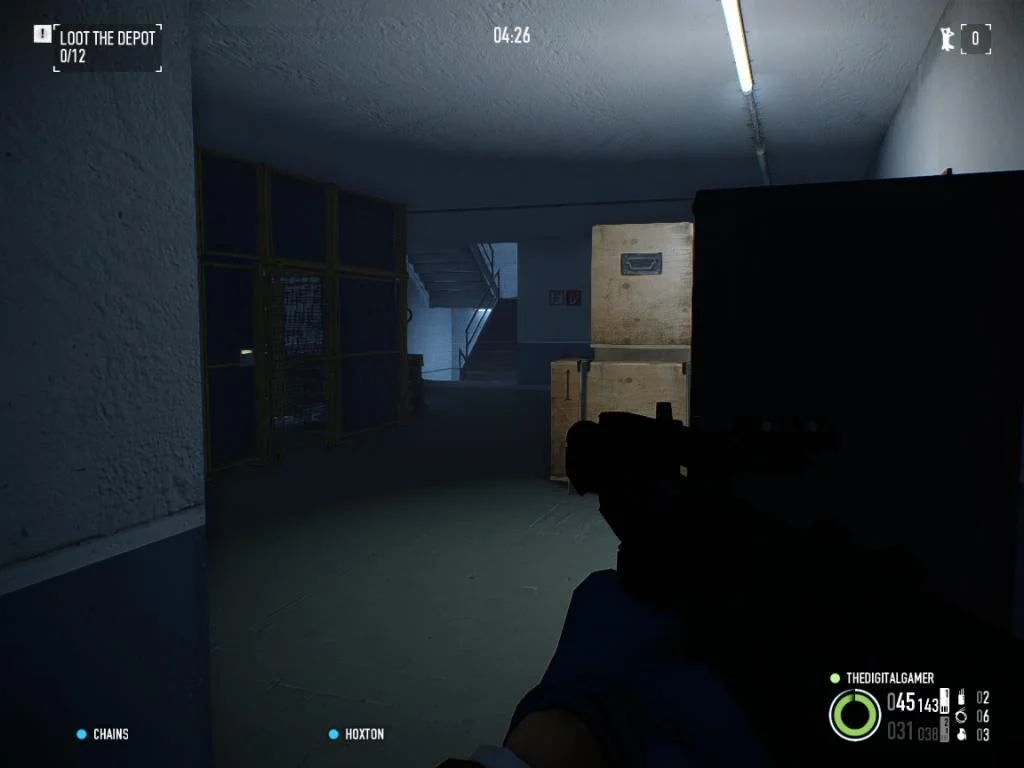
As you can see from the image above the stairs are at the opposite end of the room you are looking for. The best point of reference is the drinks machine that's directly next to the door you need to access. You know you are in the correct room as it has a table and chairs inside, sort of like a canteen area. Once in the room the Crowbar will just be lying on the table to be collected.
Crowbar Location #4
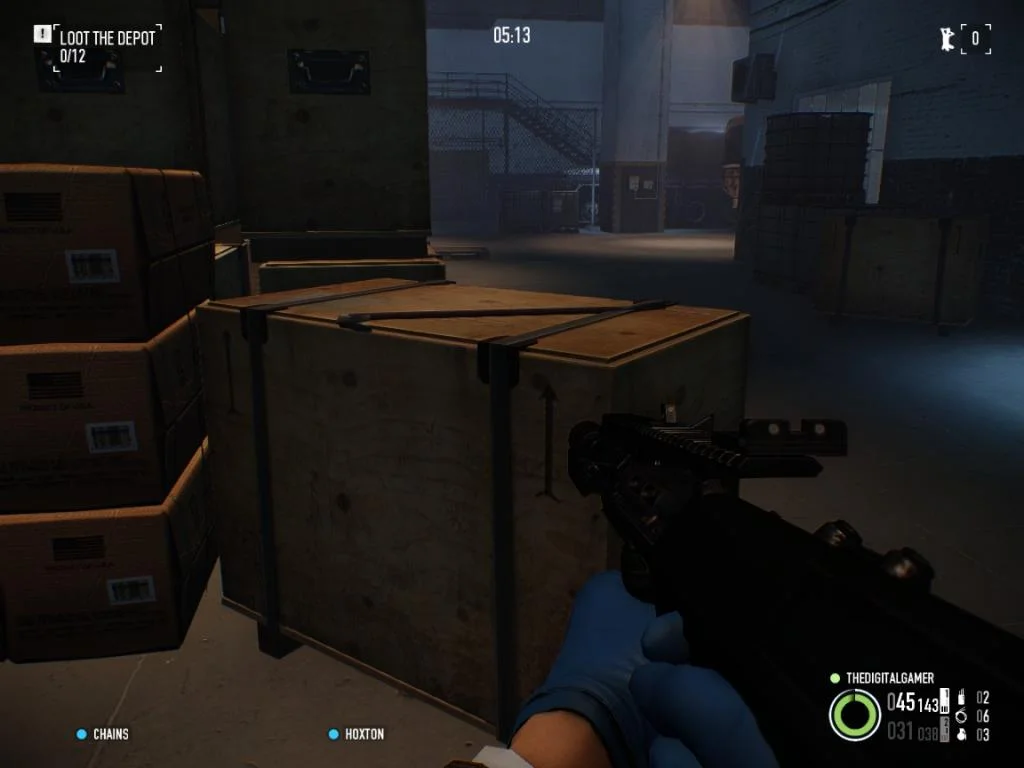
Next up we are heading into the main warehouse itself. This can be a very tricky area to navigate on the higher difficulties as there are a lot of patrols through here as well as cameras and guards that can see you from upstairs! Easiest way to find this Crowbar is to directly face the front of the safe then do a 90 degree turn to your right. If you walk straight forward you will see the Crowbar resting on the crate. Just remember to be cautious of the guards!
Crowbar Location #5
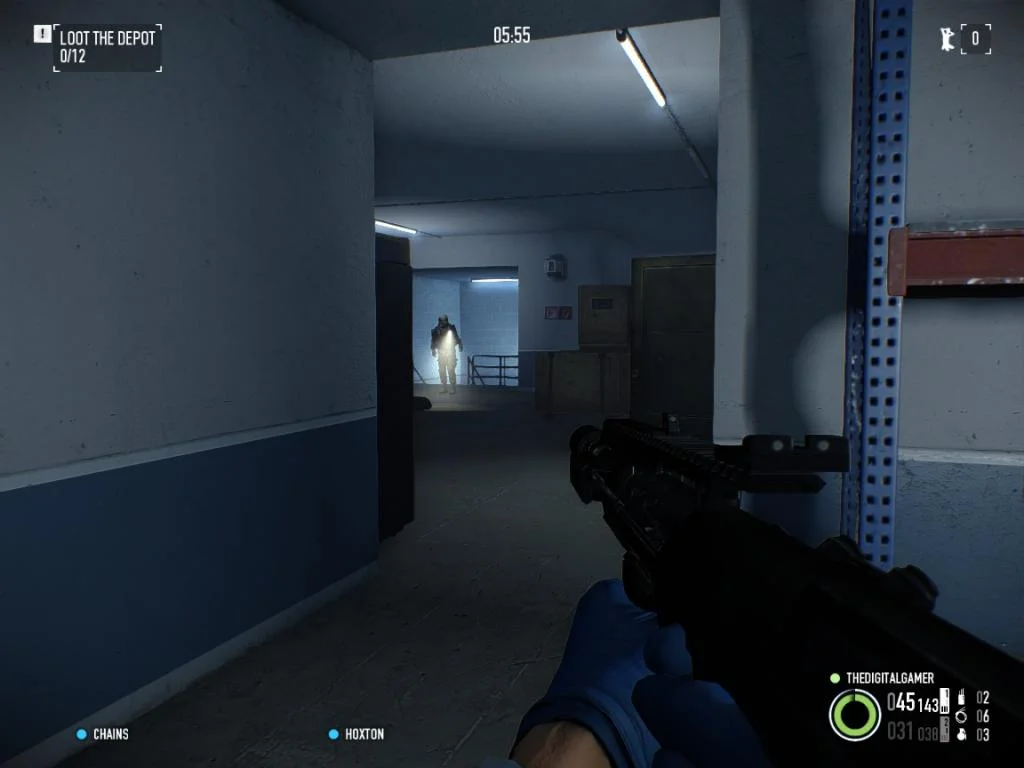
Ok so now we are moving onto a couple of the more uncommonly known Crowbar locations. To find the next one the easiest point of reference for you to use is the roof and enter through the door pictured below.
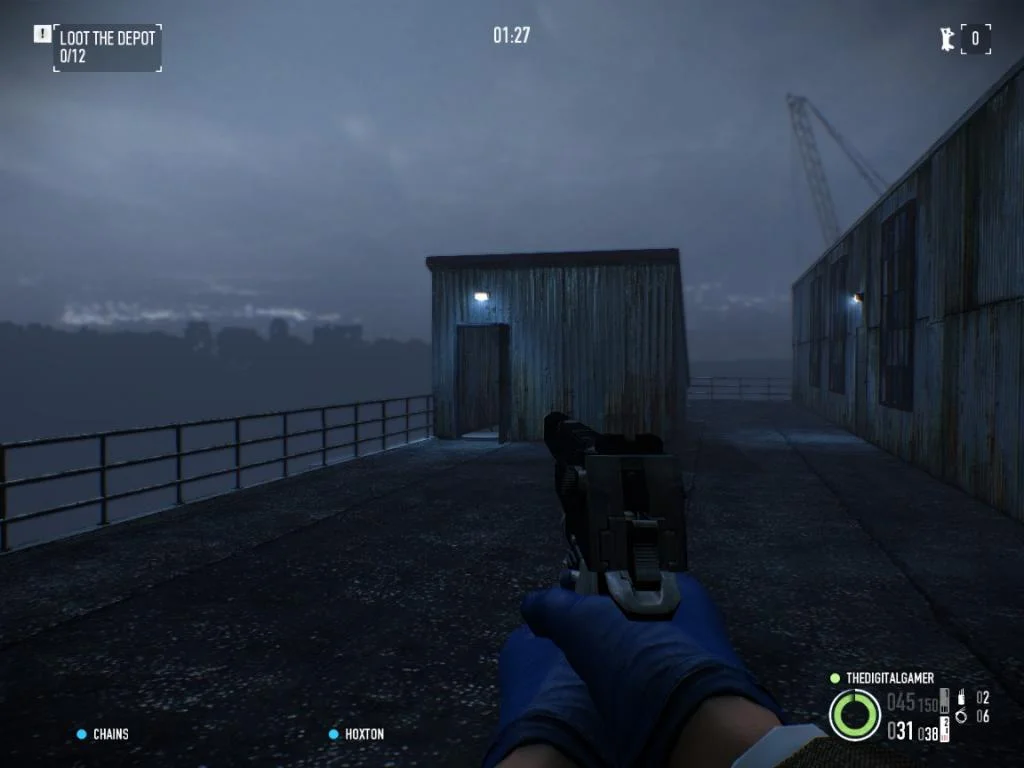
The easiest way to find that door is to look for the satellite dish. When standing near the dish you can easily see the doorway that you need to enter. As you go through that door you will have to go down a flight of stairs and then you will enter a room that has racking along the walls. When you enter this room you need to do a full 180 degree turn and you will see the crowbar leaning against a box next to more racking.
Crowbar Location #6
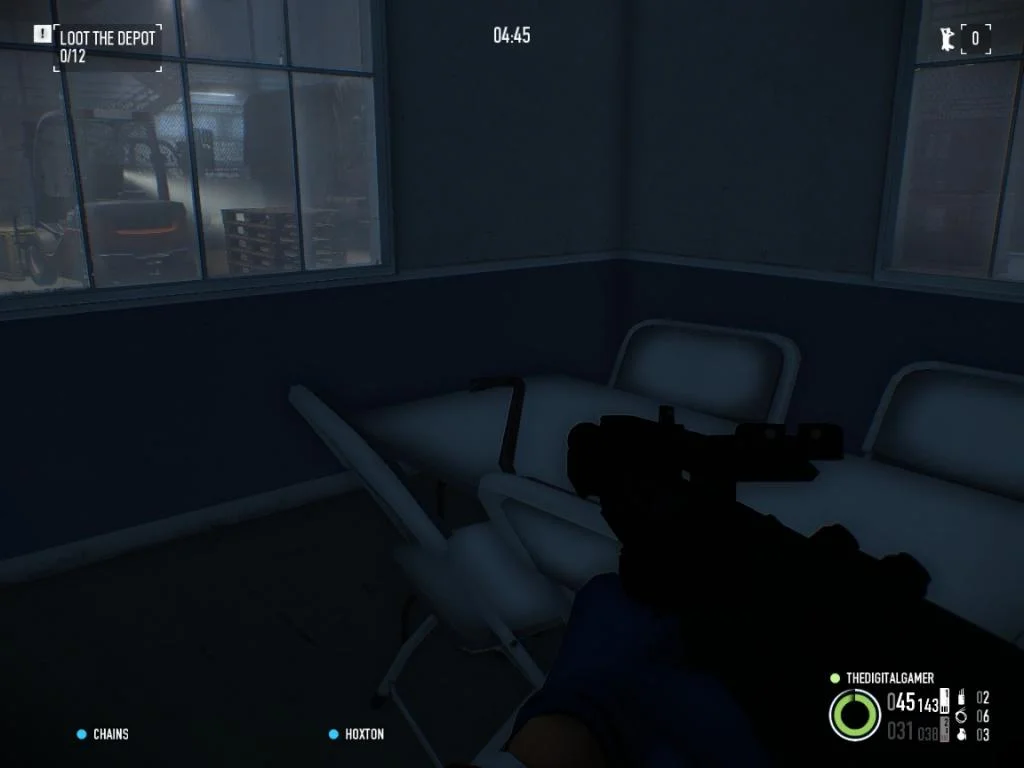
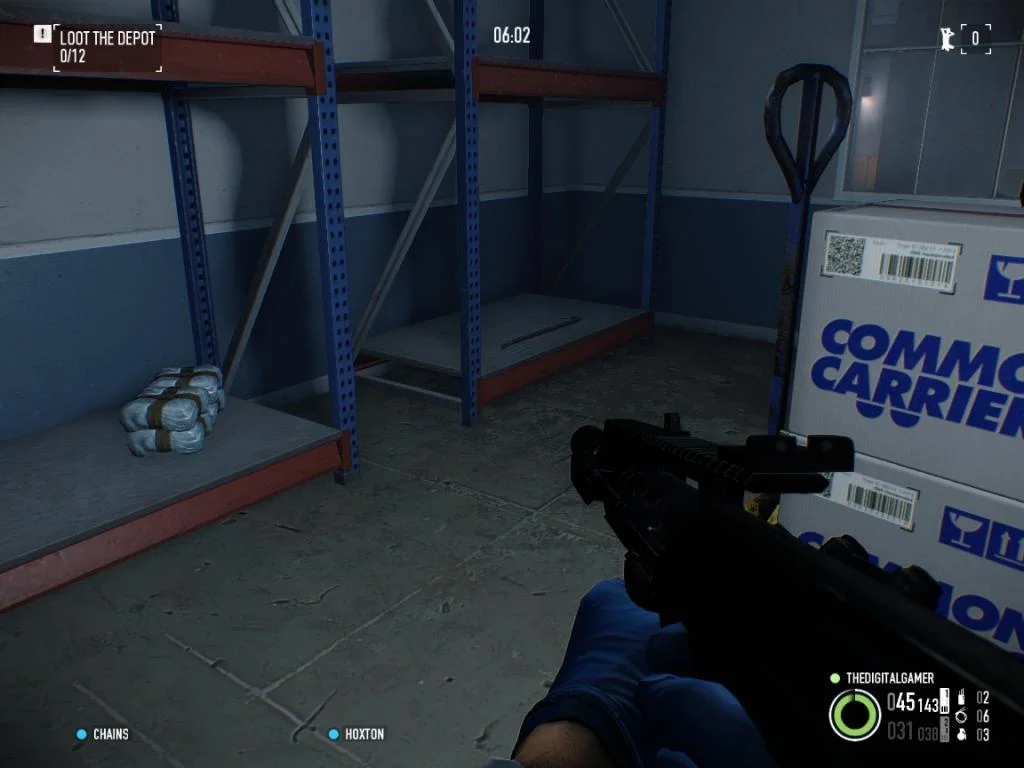
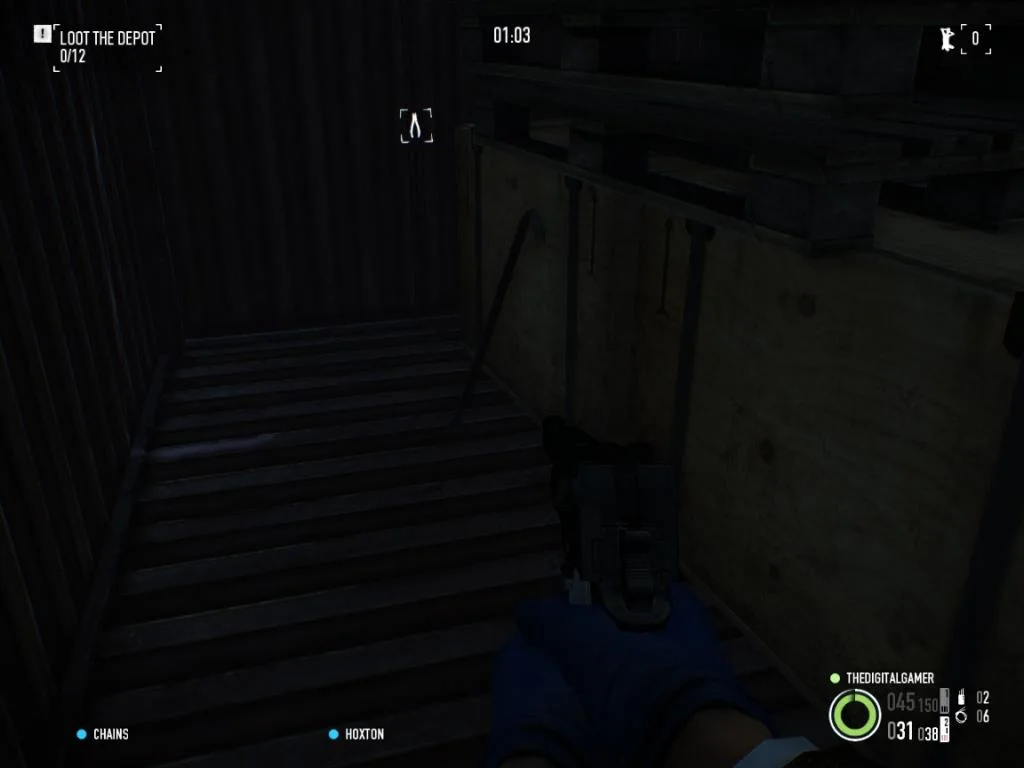
To find this one, again we want to start from the roof for the easiest point of reference. As before, go through the same door that's located near the satellite dish and then head down the stairs. When you get into the room with the racking, this time you want to head straight forward and through the door into the room that has a variety of boxes. When in this room head to the room that faces almost directly opposite the stairs as shown in the picture below.
Once in here you will see that here is some racking along the wall on your left hand side as you enter. On one of the shelves you will see the Crowbar.
Crowbar Location #7
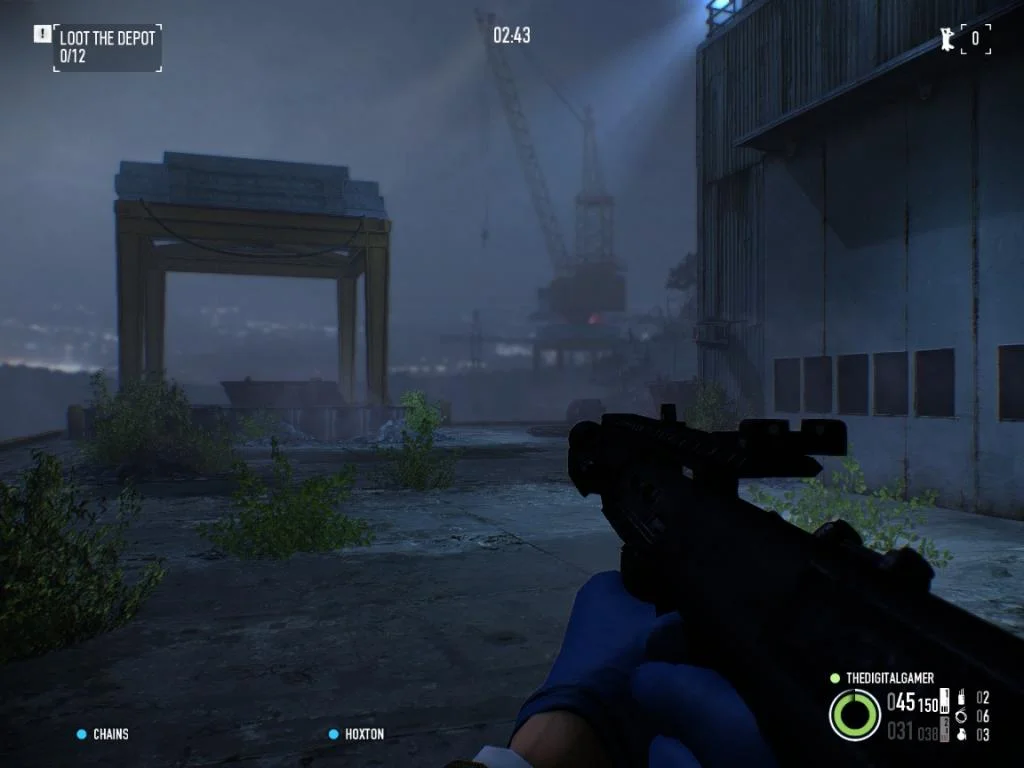
The final Crowbar location in this guide is located outside where all the containers are stored. There are a variety of routes you can take to reach this location, but ultimately, you want to head to the far corner where you see a red container on top of yellow and blue containers.
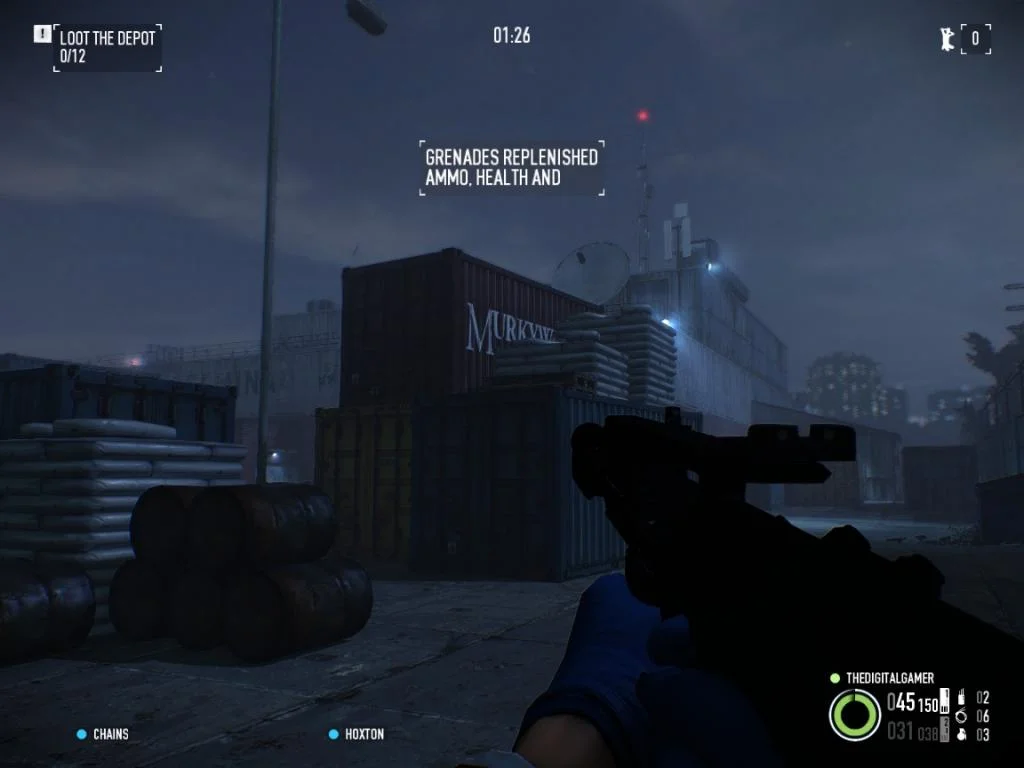
Once you have located the destination crate, you now need to open it. To do so you may want to watch the video guide to see the technique on getting up to and opening the crate, however I will do my best to describe it here. Firstly you need to use the barrels shown on the left of the picture above to get onto the first blue container. Once you have managed to get onto here you will need to jump across to the blue container where the red container is then walk to the edge to open the door. To get inside you simply repeat the process you just followed, instead of jumping to the blue container though just jump straight into the open doors of the red container and the crowbar will be there leaning against some boxes.
So that's the end of the guide guys, hopefully you all found it useful. If you have any questions or would like to discuss anything shown in the guide please don't hesitate to get in touch with me on Twitter @DigitalGamerUK or leave a comment on the Youtube video. Thanks for reading!